Share This

“Things end.But memories last forever….”
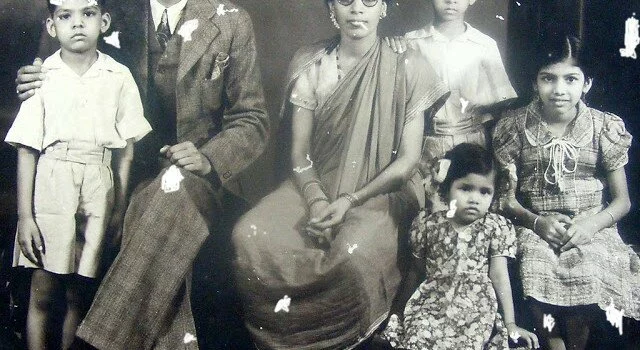
…and we try to preserve those memories in many shapes and types.Photographs were probably the oldest and most preferable way to preserve our memories. Photos taken in this digital era with digital cameras are easy to preserve as they does not get damage easily but photograph taken with earlier devices starts to Fade, Crease, Stain, and Tear. So,in this tutorial we will learn how to restore those damaged photos.
As always there are many ways to do this work.One of the way i prefer is discussed bellow.
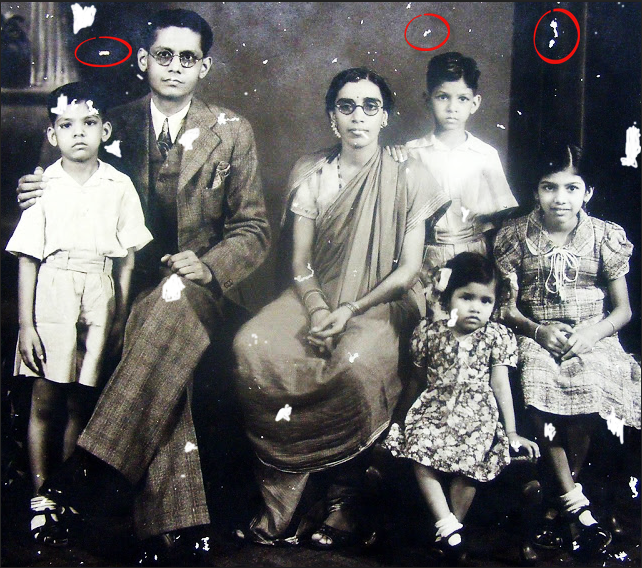
STEP 1: MARK THE DAMAGES.
Scan the photos with a good scanner and open them with photoshop. Before making any correction set your goal, imagine the final result and the changes you want to make.

STEP 2: LEVEL & CURVES
I prefer to start my restoration by changing the curves and level, many would like to do this step at the end.I prefer this step at the beginning because it gives us an overall tonal adjustment and thus we can repair the crack,faded mark to its pixel.Just keep in mind not to change the curve and level once u restore the image as some color appears different on different contrast.
Use the Curve adjustment as it gives us freedom to change the contrast and level at the same time.Use the Black dropper to select the darkest point,it will immediate effect the contrast of the image.Manually change the image to your will by adjusting the curve of the graph.I will change the line curve to a “S” curve.


STEP 3: START THE RESTORATION
As discussed earlier change the curve and level, Once its done start the restoration,but remember not to change the curve and level once restoration starts.
i. start with the big white tear at the right side and top of the image ,With a Patch tool / Clone stamp tool copy other similar part of image and replace it in the tear part.For big tear i prefer using Patch tool/Clone stamp tool as it saves a lot of time.

ii. For the smaller tear use Spot healing brush,Healing brush. Zoom and carefully inspect the spot and fill them up using Spot healing brush,Healing brush.
iii. Now for the gentleman pant’s tear, as you can see the pant is made up of very distinct pattern, so using Spot healing brush tool will not yield any reason. For those specific part we can manually draw them but it will take much time,so i prefer to use Patch tool or Clone stamp tool. Just select the part with Patch part and replace it with similar part of the pant,or Click ALT and copy the part and replace it with Clone stamp tool.
For other such similar tear we can use those tool.

iii. To restore boy’s forehead ,girl’s leg / cheek and women hand we can use the above mentioned tool.We can also do this manually but its tiresome.
iv. Pics with damaged edge must be restore to clean edge using Marquee tool.
FINAL IMAGE
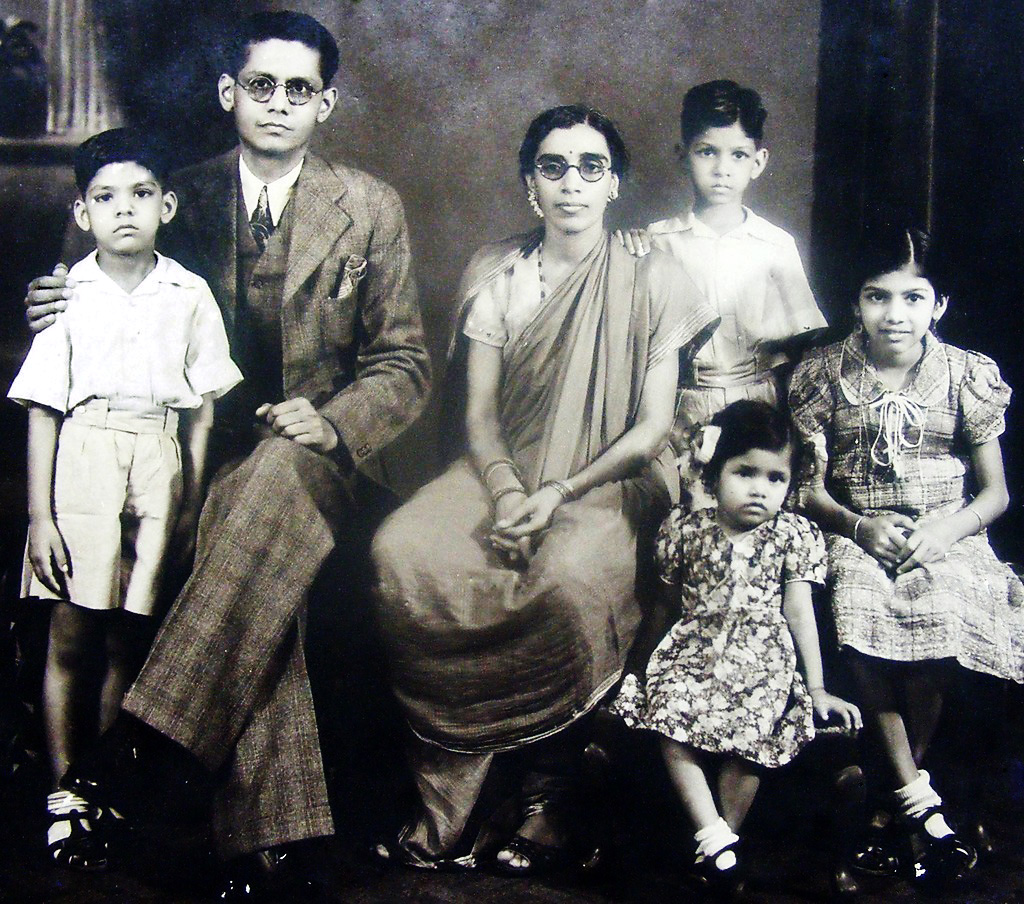
Now, Admire your result,and preserve more of those wonderful memories!